How do you beat the Once Human Great Ones? These terrifying behemoths are only some of the mutations, or deviations, you come across in Once Human, but they're by far the most powerful and the most difficult to defeat.
Thanks to Stardust deviation, survival game are correctly prepared and defeat The Great Ones together with this information on all Once Human bosses.
All Once Human bosses
Once Human bosses, or The Great Ones, are the ultimate example of what the deviation is capable of and control their own areas of the map. These gruesome monsters have been created by the deviation, turning them into the most powerful creatures in the world. However, if you know how to go against them, target their weaknesses, and have enough people to combat them, they can be defeated.

Raveous Hunter (Lvl 10)
Location: Monolith of Greed, Dayton Wetlands
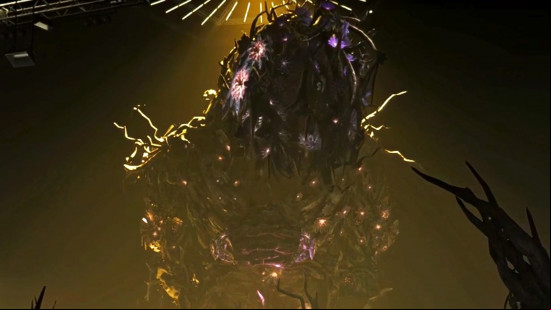
The Ravenous Hunter, is a tall, bio-mechanical creature with its humanoid host trapped inside a yellow sac on its 'head'. This Great One is the first and easiest to defeat, but it's still worth knowing how to attack.
First, you need to destroy it's Gatling weapon to destroy its shield, or attacking won't do much of anything. Keep your distance and try to stay behind cover while shooting the weapon from a distance.
Once you've destroyed the Ravenous Hunter's shield, you can actually take its weapon while the beast is stunned. Then, simply aim for its weak spot: its yellow head. This will deal the most damage and allow you to take down the creature in the quickest possible way.

Treant (Lvl 20)
Location: Gaia Cliff Monolith, Broken Delta
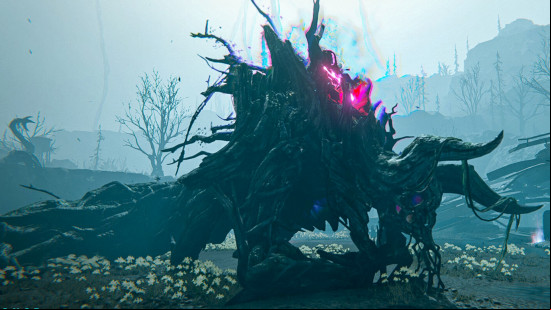
The Treant is a complex tangle of branches and vines. In fact, your first step to defeating the Treant is destroying the vines around the area to remove its invincibility. To do this, attack the glowing red weak spots. Now you can attack the Treant itself.
This huge tree creature has a horned head at the front, and you can aim for its head to deal significant damage to the Treant. However, the best course of action is to target the female humanoid on the Treant's back, as she is the Treant's weak point, and attacking her is the best way to defeat this Great One. All the while, to keep an eye on incoming attacks. White orbs can be easily avoided, but when the Treant leans forward and a red light glows from near the woman, immediately maneuver out of the way of the incoming laser beam.

Arachsiam (Lvl 30)
Location: Mirage Monolith, Iron River
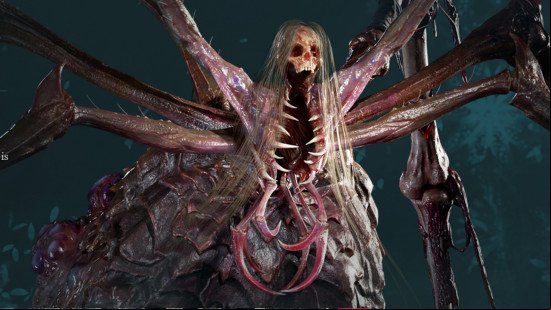
The horrifying Arachsiam is not fun if you're an arachnophobe. This creature has turned its human host into a long-haired, skeletal, spider creature that towers over you. As you can imagine, one of her attacks leans into her aesthetic and cocoons you in spider web, dealing damage and incapacitating you at the same time. This attack is hard to avoid, but can be seen coming when she moves her body beneath her – though you only have a split second to get out of the way. You should also be aware of her rush attack, but her screech before this gives it away.
To attack, you need to try and get behind her to aim for her weak spots: glowing purple pustules on her back. As with all Great Ones, you can deal damage to her anywhere, but hitting these deals the greatest amount of damage.

Rabizex (Lvl 40)
Location: Monolith of Thirst, Chalk Peak
This Great One is a dog-like beast with sharp fangs covering most of its upper body. Naturally, it uses these fangs, and its sharp claws, to attack those who enter the Rift Space. The Rabizex also attacks at range as well, though, with a powerful release of Stardust energy.
To counter the Rabizex, all you can do is aim your attacks at the weak points on its body when possible, consistently firing at it with your most powerful weapons. In this case, the best offence is actually defense, as you should be aware of Rabizex's movements at all times, keep you distance, and be ready to jump out of the way of it and its attacks.

Mensdevoran (Lvl 60)
Location: Forsaken Monolith, Red Sands
This colossal enemy is incredibly difficult to defeat, and its attacks can deal serious damage, so the first thing to note here is to be light on your feet and aware of the Mensdevoran's attacks. It will both slam down its huge hands and sweep them across the ground. While the former is fairly easy to out-maneuver, provided you to jump over the shock waves it causes, the latter can be avoided by getting as close to the body of the Mensdevoran as possible. Later in the battle, it attempts even more powerful attacks and reduces the size of the combat area.
To attack, aim for glowing weakspots as they appear on the Mensdevoran's body. And, mainly, avoid as many incoming attacks as possible.
Hopefully this helps you take down each of the Once Human bosses with ease. These terrifying dungeons aren't the only part of this Once Human codes. If you'd rather fight other players than terrifying monsters, then you might be wondering about Once Human PvP, and we can tell you all about it.
